Windows UI Simulator
The DejaOS Simulator is a native desktop UI runtime integrated into VSCode DejaOS Plugin v1.0.44. It executes the current project's JavaScript with QuickJS and renders dxUi through LVGL's Windows driver, allowing you to preview and interact with a device UI before deploying it to physical hardware.
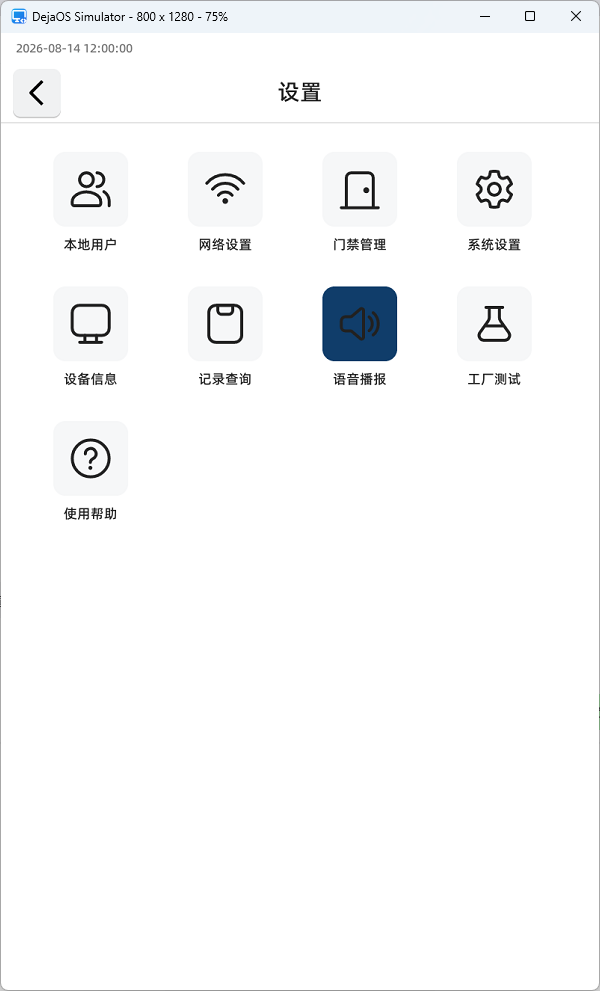
The first release supports local Windows x64 VSCode environments. Remote SSH, WSL, VSCode Web, macOS, and other platforms are not currently supported.
What the Simulator Supports
- Native QuickJS execution and LVGL/dxUi rendering
- Projects written for SDK 2.0 UI Workers or the SDK 4.0 unified runtime
.uifiles loaded throughuiLoader- Project images and TTF fonts, including
/app/code/...resource paths - Mouse interaction, buttons, text input controls, JavaScript UI events, animations, and timers
- The project's own
dxmodules/dxDriver.jsdisplay configuration - Runtime logs in the VSCode DejaOS Simulator output channel
The logical display width, height, DPI, and board constants come from the project's dxDriver.js. Rotation is applied when the application initializes dxUi. If the logical screen is larger than the desktop, the simulator initially scales the window to fit the current monitor while preserving the device aspect ratio. Resizing or maximizing the window does not change the application's logical layout coordinates.
Before You Begin
The project must contain:
app.dxproj
dxmodules/
  dxDriver.js
src/
  main.js
Before running the simulator:
- Open the project in a local, trusted VSCode window.
- Use Install in the DejaOS IDE so that
dxmodules/dxDriver.jsand the project's other generated modules are present. - Confirm that
src/main.jsinitializes the application's UI normally. - Keep
.uifiles, images, fonts, and other application resources inside the project directory.
Run from the IDE
Click Simulator in the VSCode status bar.
On the first run of a simulator version, the IDE asks whether to download and install the Windows x64 runtime. After confirmation, it downloads the archive, verifies its SHA-256 checksum, and installs it in VSCode's extension storage rather than in the DejaOS project. A new simulator version is installed in a separate versioned directory.
The IDE then:
- Selects the DejaOS project associated with the active file, or asks you to choose when the workspace contains multiple projects.
- Starts the project's
src/main.jswith the project root passed explicitly to the simulator. - Opens the native simulator window and the DejaOS Simulator output channel.
Clicking Simulator again stops the previous simulator process before starting a new one. Closing the simulator window also ends the process.
Project Paths and Data
The simulator maps device-style paths to the desktop project:
| Application path | Windows simulator location |
|---|---|
/app/code/... | The current DejaOS project directory |
/app/data/... | <project>/.simulator-data/... |
This allows existing paths such as /app/code/src/pages/settings.ui, /app/code/resource/image/icon.png, and /app/code/resource/font/font.ttf to work without changing UI code just for Windows.
dxDriver.js is always loaded from the current project. Other known DejaOS components are normally loaded from the simulator runtime first so that Linux shared-library wrappers are not loaded on Windows. Custom and compatible pure-JavaScript components can fall back to the project copy.
Runtime Boundaries
The simulator is designed for early UI development, not complete device emulation.
- dxUi/LVGL rendering,
uiLoader, the project display configuration, and common UI interactions are real simulator behavior. - Most hardware, network, database, camera, facial recognition, NFC, GPIO, and device-service components are mock or best-effort implementations.
- Mock functions may return placeholder values only to let the application continue. They do not guarantee that business branches, timing, events, or failure handling match a real device.
- Device performance, camera preview, hardware input/output, system integration, final font appearance, and touch behavior must still be tested on the target device.
For a project that depends heavily on hardware during startup, separate UI initialization from hardware initialization or inject application-owned mock data while working in the simulator. The production path should continue using the real generated DejaOS components.
Recommended Workflow
- Build the control tree visually with the Visual UI Editor or regular dxUi code.
- Run the page in the simulator and iterate on layout, images, fonts, navigation, input, and events.
- Use mock data at the application boundary when the UI needs records or device state.
- Deploy to the target device and validate hardware behavior, component APIs, timing, resources, and performance.
Troubleshooting
- Simulator button reports a missing project file: confirm that the selected project contains
app.dxproj,src/main.js, anddxmodules/dxDriver.js. - The runtime cannot be downloaded: check the network connection and retry. Each archive is checksum-verified before installation.
- Images or fonts are missing: keep resources inside the project and use
/app/code/...runtime paths. Check the DejaOS Simulator output channel for the resolved path or loading error. - The application starts but device logic is incorrect: check whether the relevant component is a simulator mock, then isolate that dependency or test the behavior on the real device.