dxScreenshot
1. Overview
dxScreenshot is a high-level screenshot helper module for DejaOS UI applications.
It provides a simple way to:
- Configure screenshot upload behavior via a simple initialization.
- Automatically start a background process to handle file uploads.
- Take screenshots manually or bind them to UI interactions (e.g., double-clicking the screen).
- Automatically capture and upload UI screenshots from running devices for debugging and remote diagnostics.
2. Files
dxScreenshot.js– Main JavaScript helper module used in your UI code.screenshotworker.js– Background process script that handles scanning and uploading.
Ensure both files are placed under the
dxmodulessubdirectory of your project root (e.g./app/code/dxmodules/).
3. Dependencies
dxScreenshot requires the following DejaOS modules to be enabled in your project:
dxLoggerdxStddxMapdxNetworkdxHttpClientdxEventBus
4. Compatible Devices
Compatible with all devices running dejaOS v2.0+ with the DejaOS UI engine (dxUi) enabled.
5. How it Works
The dxScreenshot module operates in the background to ensure your UI remains responsive:
- Capture: When you trigger a screenshot (manually or via double-click), the module captures the current UI state and saves it to the device's local storage.
- Upload: A background process automatically monitors the local storage and uploads any pending screenshots to your configured server whenever a network connection is available.
- Cleanup: To save space, screenshots are automatically deleted from the device once they are successfully uploaded.
6. Configuration & Storage
- Local Storage: Screenshots are temporarily stored in
/app/data/snapshot/. - Upload Settings: All upload behavior (URL, network settings) is configured once during initialization via
DxScreenshot.init().
7. API Reference
All functions are available through the default export DxScreenshot.
7.1 DxScreenshot.init(options)
Initializes the screenshot utility and starts the background upload process. This should typically be called once in your main application entry point.
Parameters:
options{Object}:uploadUrl{string}– The HTTP/HTTPS endpoint where screenshots will be uploaded.autoNet{boolean}(optional, default:false) – Set totrueif you want the module to automatically manage network connectivity (Ethernet/Wi-Fi).netType{"eth"|"wifi"}(optional) – Required ifautoNetistrue.ssid{string}(optional) – Wi-Fi SSID (required for Wi-Fi auto-net).password{string}(optional) – Wi-Fi password (required for Wi-Fi auto-net).
7.2 DxScreenshot.screenshot(view, fileName)
Takes a screenshot of the specified UI view and saves it to local storage for subsequent upload.
Parameters:
view{object}– The UI view object to capture (must support the.snapshot()method).fileName{string}– The target name for the screenshot file (e.g.,"error_report.png").
7.3 DxScreenshot.buildFileName(prefix)
A helper utility to generate unique filenames based on the current system timestamp.
Parameters:
prefix{string}(optional, default:"screenshot") – The prefix for the filename.- Returns: A formatted string like
prefix_20251223_101530.png.
7.4 DxScreenshot.bindDoubleClickScreenshot(view, options)
A convenience method to bind "double-click to capture" behavior to any UI element. This is very useful for adding "invisible" diagnostic triggers to your background or main containers.
Parameters:
view{object}– The UI component (e.g., a View) to bind the behavior to.options{object}(optional):interval{number}– Maximum time window (in ms) to detect a double-click. Default:400.prefix{string}– Filename prefix for the generated capture. Default:"home".
8. Usage Example
import dxui from "./dxmodules/dxUi.js";
import std from "./dxmodules/dxStd.js";
import log from "./dxmodules/dxLogger.js";
import DxScreenshot from "./dxmodules/dxScreenshot.js";

// 1) Init UI
dxui.init({ orientation: 1 });

// 2) Init DxScreenshot with upload settings
DxScreenshot.init({
  uploadUrl: "http://your-server.com/upload",
  autoNet: true,
  netType: "wifi",
  ssid: "YourSSID",
  password: "YourPassword",
});

// 3) Build your UI
const root = dxui.View.build("main_root", dxui.Utils.LAYER.MAIN);
root.setSize(480, 320);
root.bgColor(0x1c2331);
dxui.loadMain(root);

// 4) Bind double-click screenshot to the root view
// Now, double-clicking any empty area on the screen will trigger a capture
DxScreenshot.bindDoubleClickScreenshot(root, { prefix: "diagnostic" });

// 5) UI event loop
std.setInterval(() => {
  dxui.handler();
}, 20);
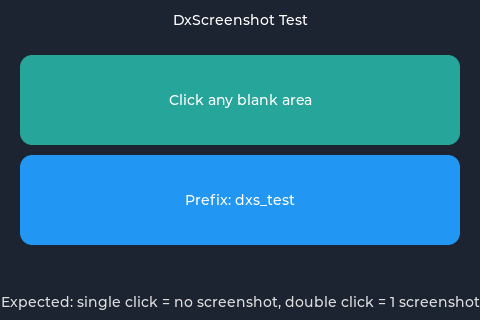
8.1 Example UI Screenshot
The following image shows the reference test UI layout:
9. Example Upload Server (Node.js)
For testing purposes, you can use a simple Node.js server to receive files:
const express = require("express");
const multer = require("multer");

const app = express();
const upload = multer({ dest: "uploads/" });

app.post("/upload", upload.single("file"), (req, res) => {
  console.log("Received:", req.file.originalname);
  res.json({ status: "ok" });
});

app.listen(3000, () => console.log("Server running on port 3000"));
10. Best Practices & Notes
- Network Management: If your application already manages network connectivity, set
autoNet: falseto avoid conflicts. - Privacy: Only use this module in development or for specific diagnostic purposes with user consent, as it captures the entire visible UI.
- Cleanup: The module automatically deletes files after a successful upload. If uploads fail repeatedly, manually check
/app/data/snapshot/to ensure the device storage isn't full.